I write now and again with email pals about the various birds we get to see here. It seemed an interesting post to share; I've narrowed down though, to the colourful parrots and cockatoos.
We are really lucky to have a narrow 'bush corridor' outside of our back boundary, so it naturally is frequented with a nice balance of beautiful birds.
 These are the raucous, but brilliantly coloured Rainbow Lorikeets. I often refer to them as the Concordes because of their very fast and direct flight path.
They're naturally a nectar-eating bird (we think they get 'high' on the nectar and that's why they become so roudy), but it doesn't stop them eating out at our feeder too.
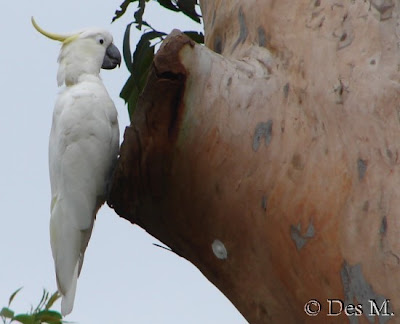 This one, the sulphur-crested white cockatoo; looking for a potential nesting site maybe in the huge old angophora tree, way up high.
 ...and yes a quick check-in at the feeder.
 Now it's time for the more timid rosella. This male is more vibrantly coloured than the female. They tend to wait till the other birds have been and gone before they venture to the feeder. It's not easy to get a photo of the rosellas like this; they want to bolt the moment we open up the back door mostly.
 These pink/grey galahs are much more accommodating and people-friendly.
I'm forever amazed at the colours of the different birds, whether they be the flamingos of Sth. America, or the parrots of Australia.
 It's a corella on the back fence.
 A yellow-tailed black cockatoo has a beak like a vice; you wouldn't want it around your finger! This one has been chewing at the tree, no trouble at all, for .....
 food source, grubs of some kind. They're not doing this regularly on this tree. It appears they know that at a certain time of year those grubs will be hatching, and that's when we get to see them.
The next/last photo is not one of the cockatoos from here, but it is the red-tailed black cockatoo. A photo I'd taken when we were holidaying in Victoria, at a bird-park.
The owner fanned out this cockatoo's tail and I thought it makes for a grand-finale pic with an appropriate caption, for my post today.


